This month marks 50 years since the Apollo 11 mission which carried astronauts Neil Armstrong, Michael Collins and Buzz Aldrin into space and led to Armstrong and Aldrin becoming the first men to set foot on the moon.
July 16th, 2019, is exactly 50 years since that famous liftoff from Kennedy Space Center in Florida, and it also coincides with a full moon!
If skies are clear, why not celebrate this landmark in human history by photographing the moon. Here are three different ways you can incorporate the moon into your images.
Shoot a moonlit landscape
A full moon throws a surprising amount of light onto the landscape, so you’ll be able to compose and frame your shot with the naked eye. You’ll need a tripod and a wide angle lens – anything up to 35mm – to capture the scene.
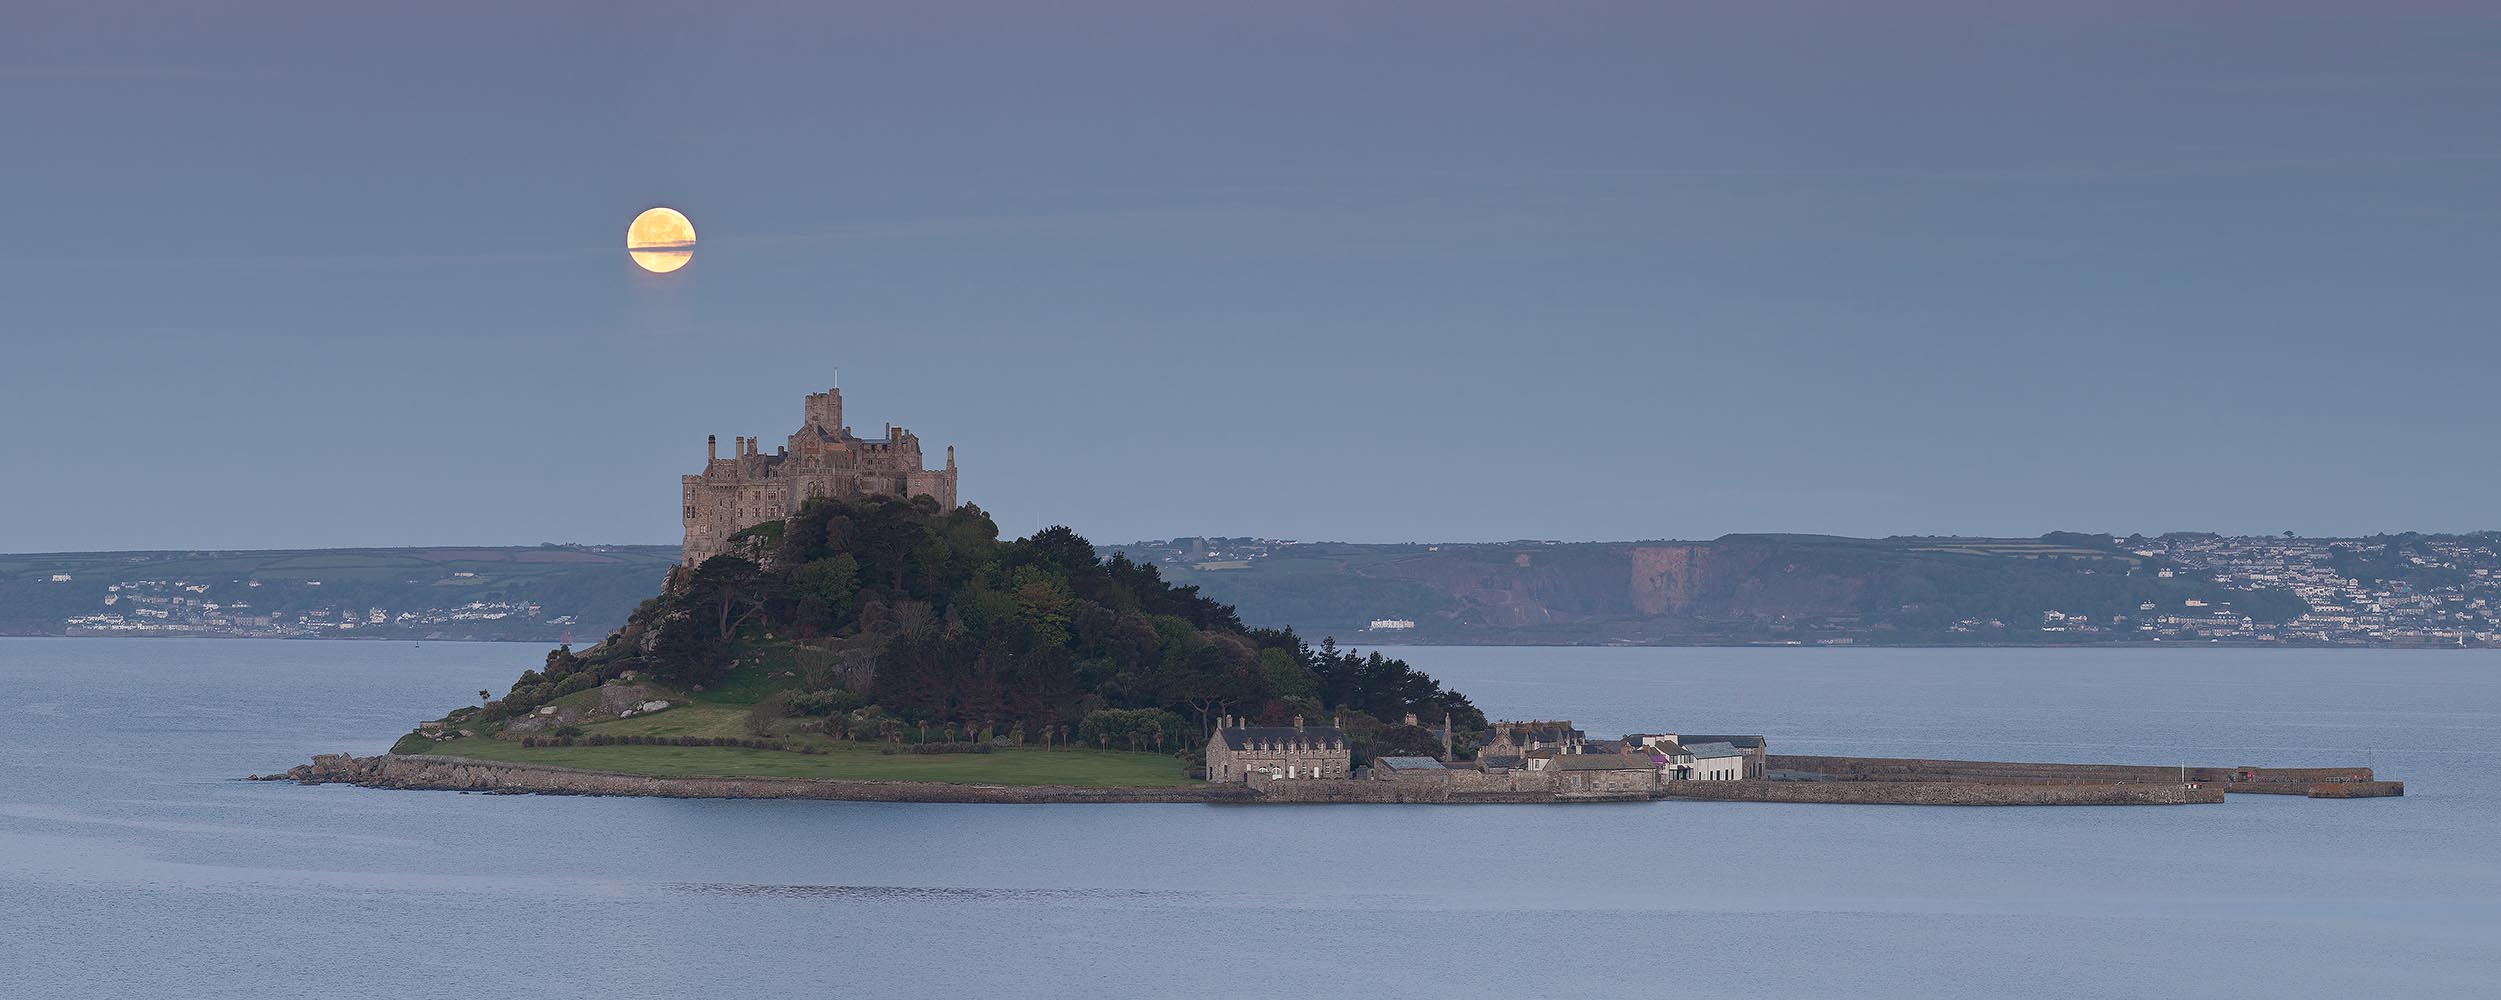
St Michael’s Mount
Esen Tunar
Canon EOS 5D Mark II / EF70-200mm f/4L USM
Settings: 159mm / 1/4s / F11 / ISO 400
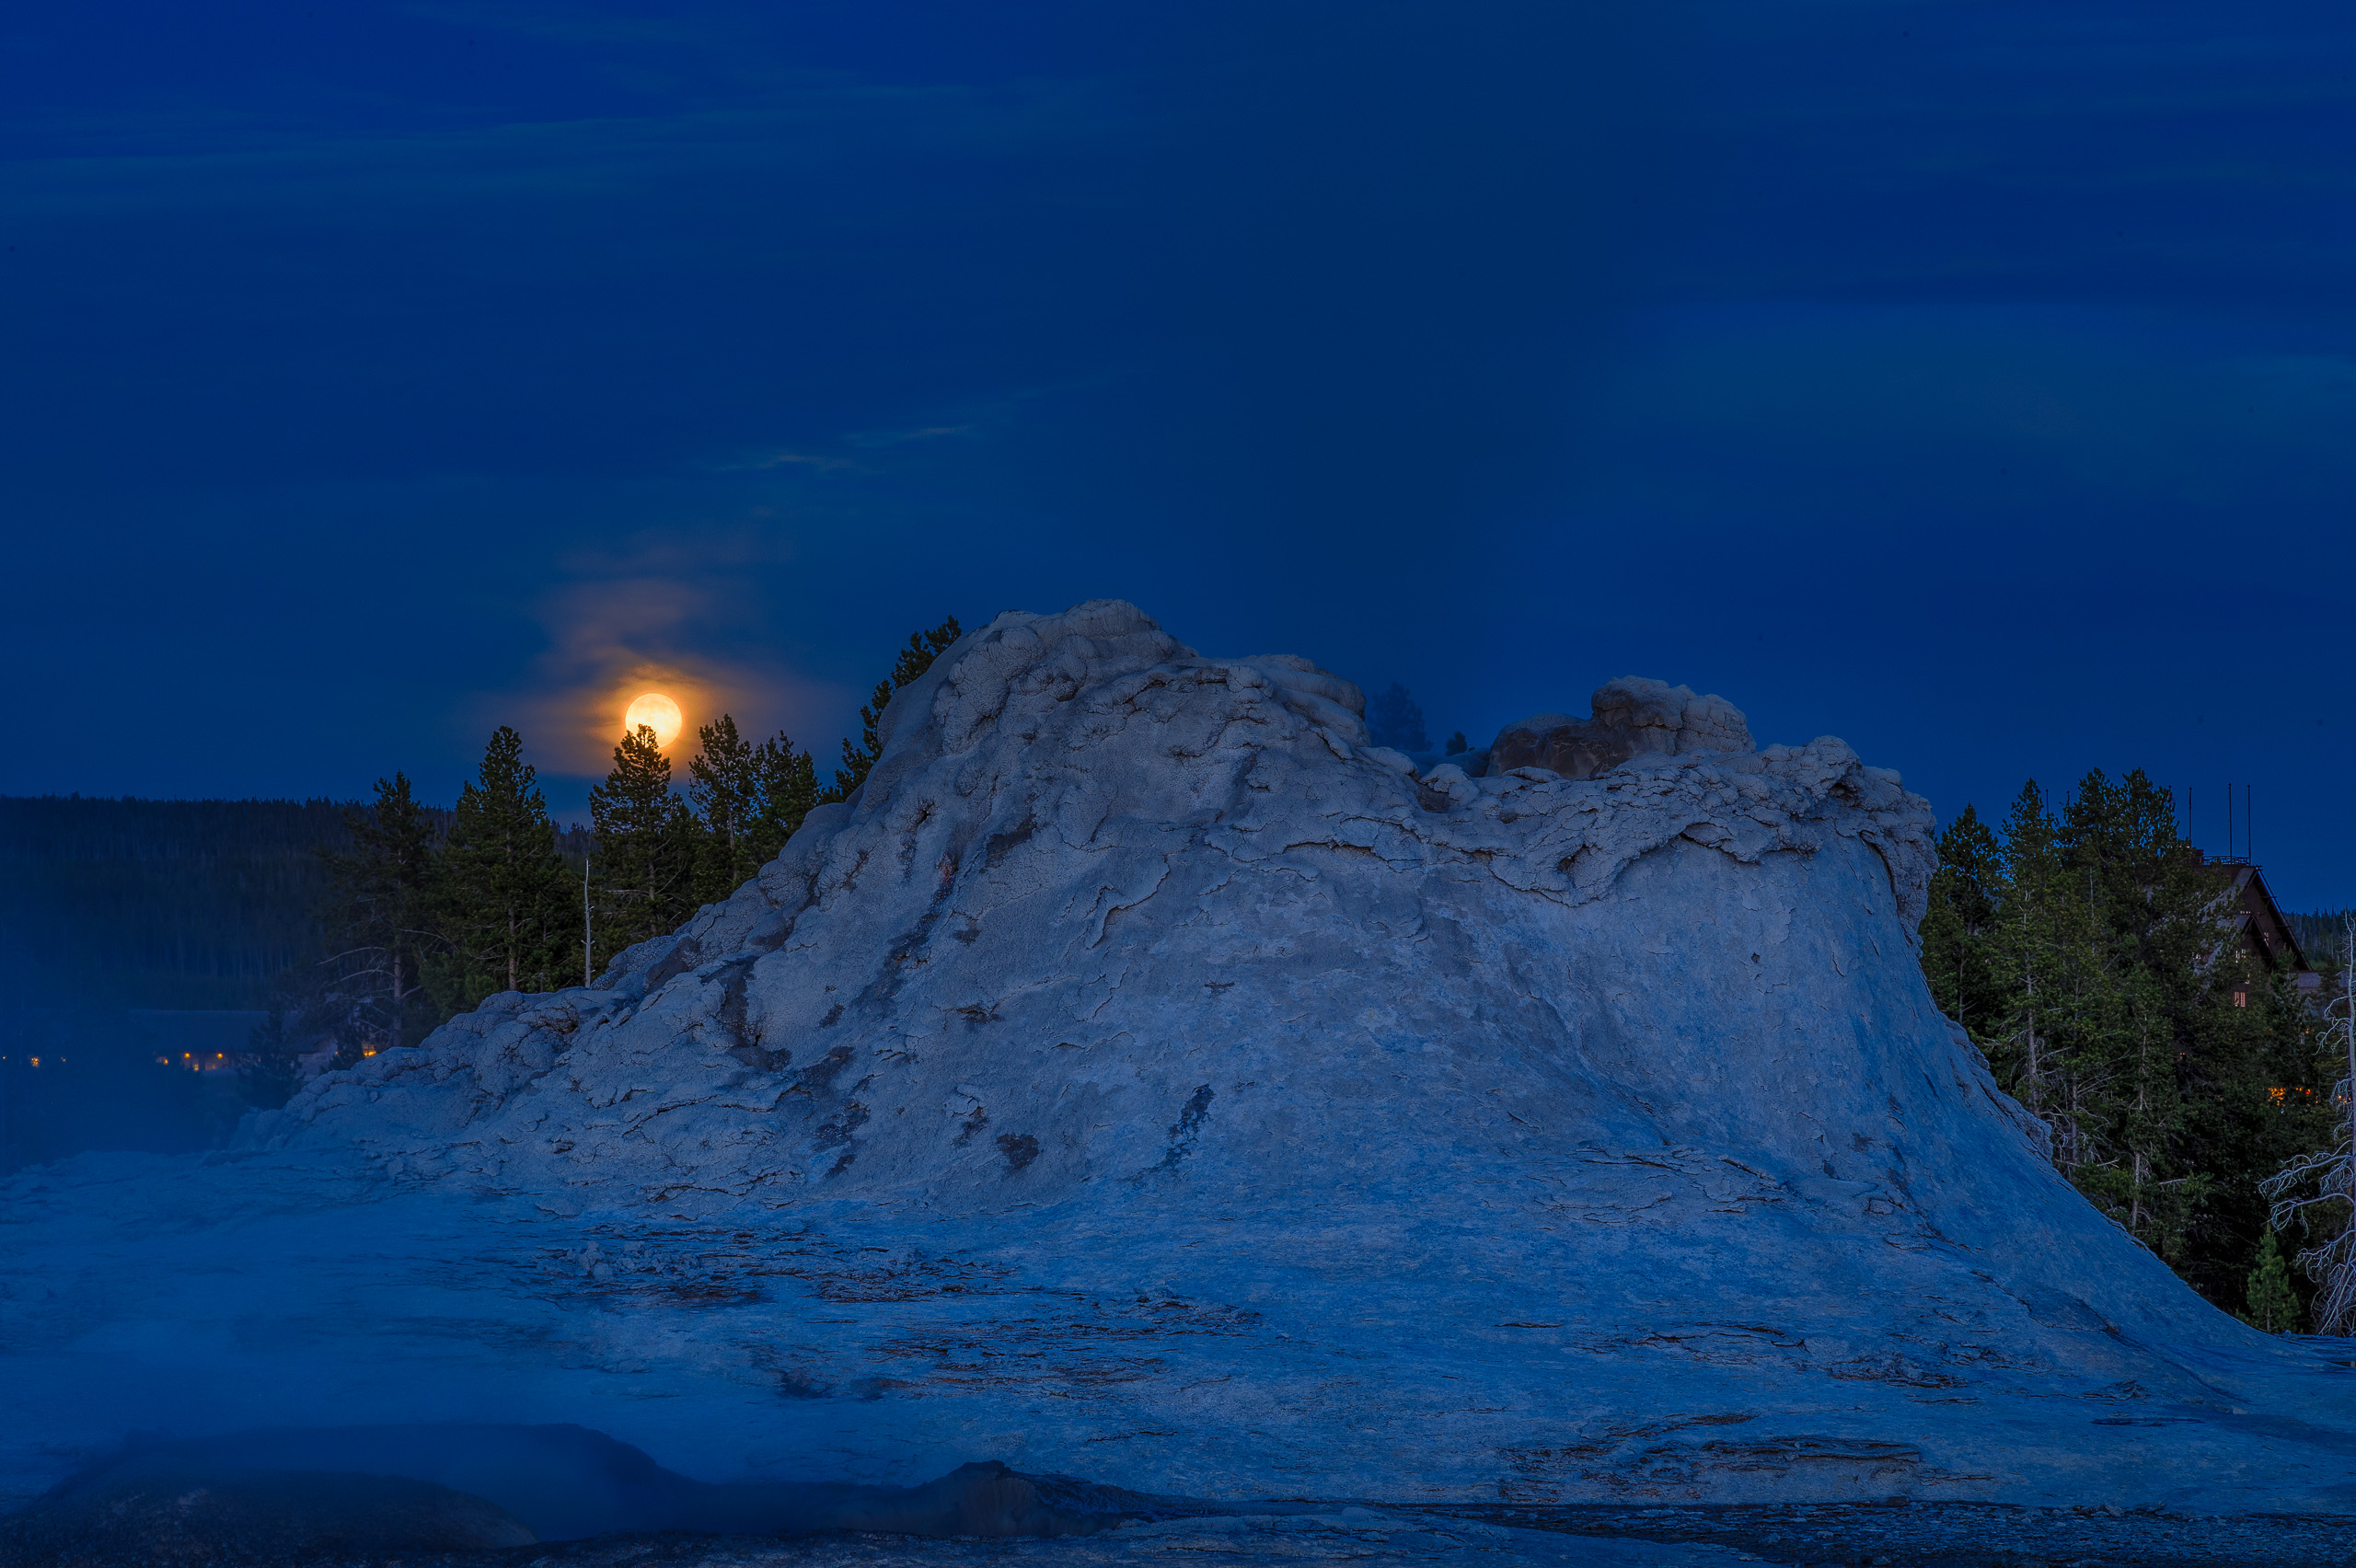
Castle Geyser, Yellowstone
Lewis Kemper
Canon EOS-1D X / EF24-105mm f/4L IS USM
Settings: 95mm / 1s / F16 / ISO 400
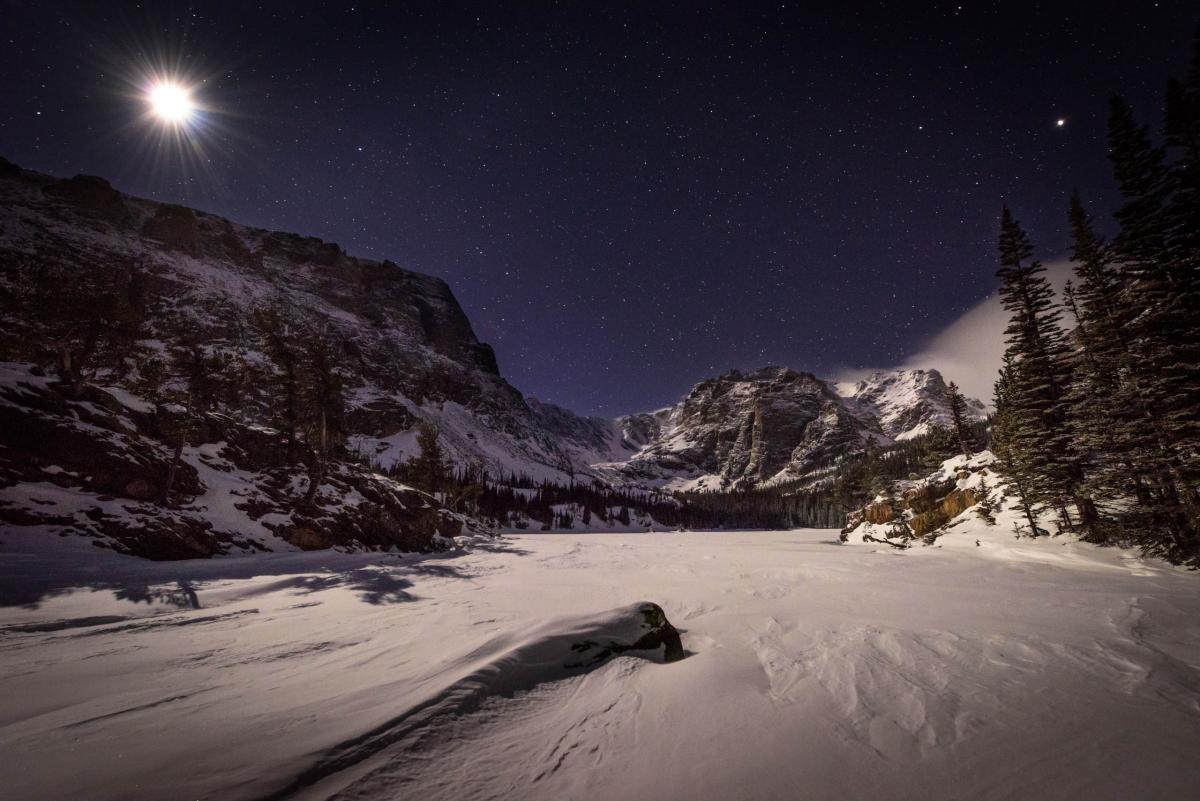
The Loch, Rocky Mountain NP
Erik Stensland
Nikon D810 / 14.0-24.0 mm f/2.8
Settings: 15mm / 20s / F6.3 / ISO 100
Lunar reflections
If you can, look for a body of water to shoot – the sea, a lake, or a flowing river – and incorporate the moon’s reflection into your scene. If you want a sharp moon with a detailed surface, think about bracketing your shots and combining them later using Lightroom’s merge-to-HDR function, or more advanced plugins such as Skylum Software’s Aurora HDR.
Alternatively, use a longer exposure and create a smooth surface to the water, with the moon as a bright glowing disc.
The lower the moon is on the horizon, the closer you can zoom in, so a lens in the range of 50mm to 200mm could work for such a composition.
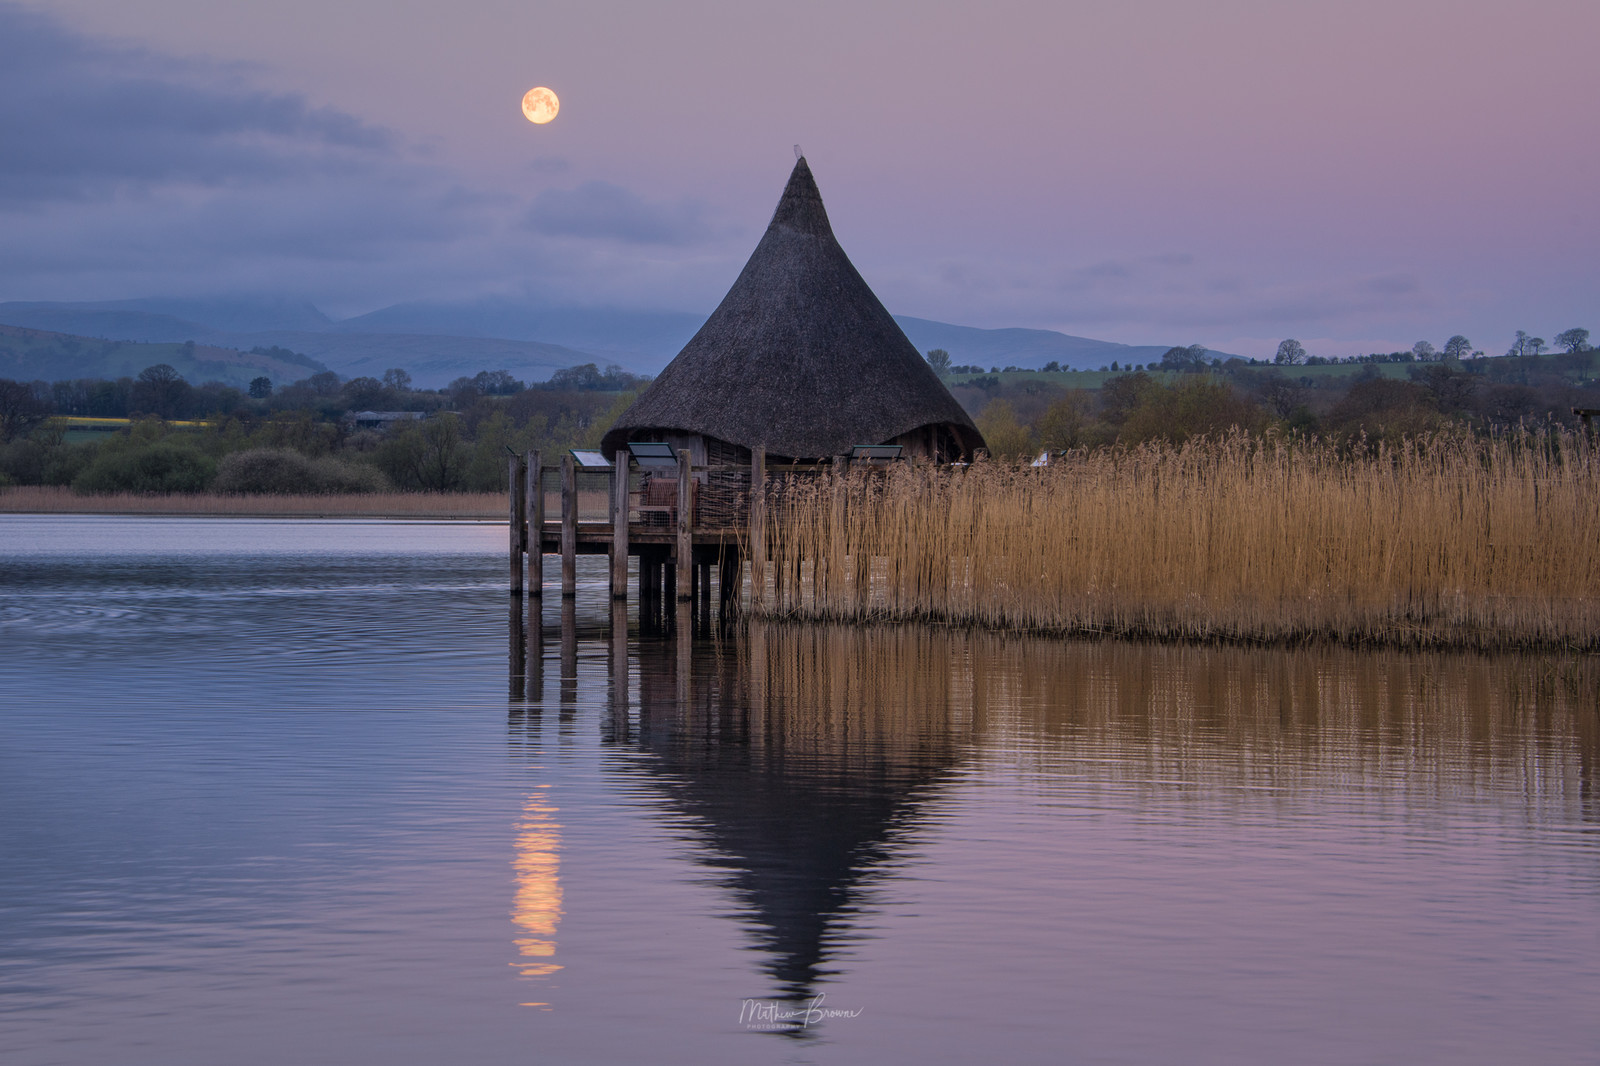
Llangorse Lake, Wales
Mathew Browne
Nikon D850 / 28.0-300.0 mm f/3.5-5.6
Settings: 72mm / 1/8s / F11 / ISO 200
Zoom in on moonrise or moonset
With some planning, good timing, and a bit of luck, you can capture the moon juxtaposed with a distant object, using a superzoom lens. Think about objects that would look interesting next to, or silhouetted against, the moon such as tall buildings, distant hills and mountains, monuments, trees, or interesting geological formations.
The Photographer’s Ephemeris is a wonderful tool to research the exact angle of elevation and viewing distance to determine if the shot you imagine is possible.
A telephoto lens and a sturdy tripod are essential to getting the shot. The more you zoom, the more any vibration or disturbance in your equipment is magnified. Also worth remembering that the more you zoom, the quicker the moon moves in and out of frame – you may need to recompose quickly if you have misjudged!
Lenses up to 300mm are good to capture a medium-sized moon in your final image, but for those spectacular, frame-filling moon shots you’ll need to go big. 500mm and above is best, and consider a teleconverter to give yourself extra range. You will need to be a fair distance away from your foreground object – 2 km and above is ideal.
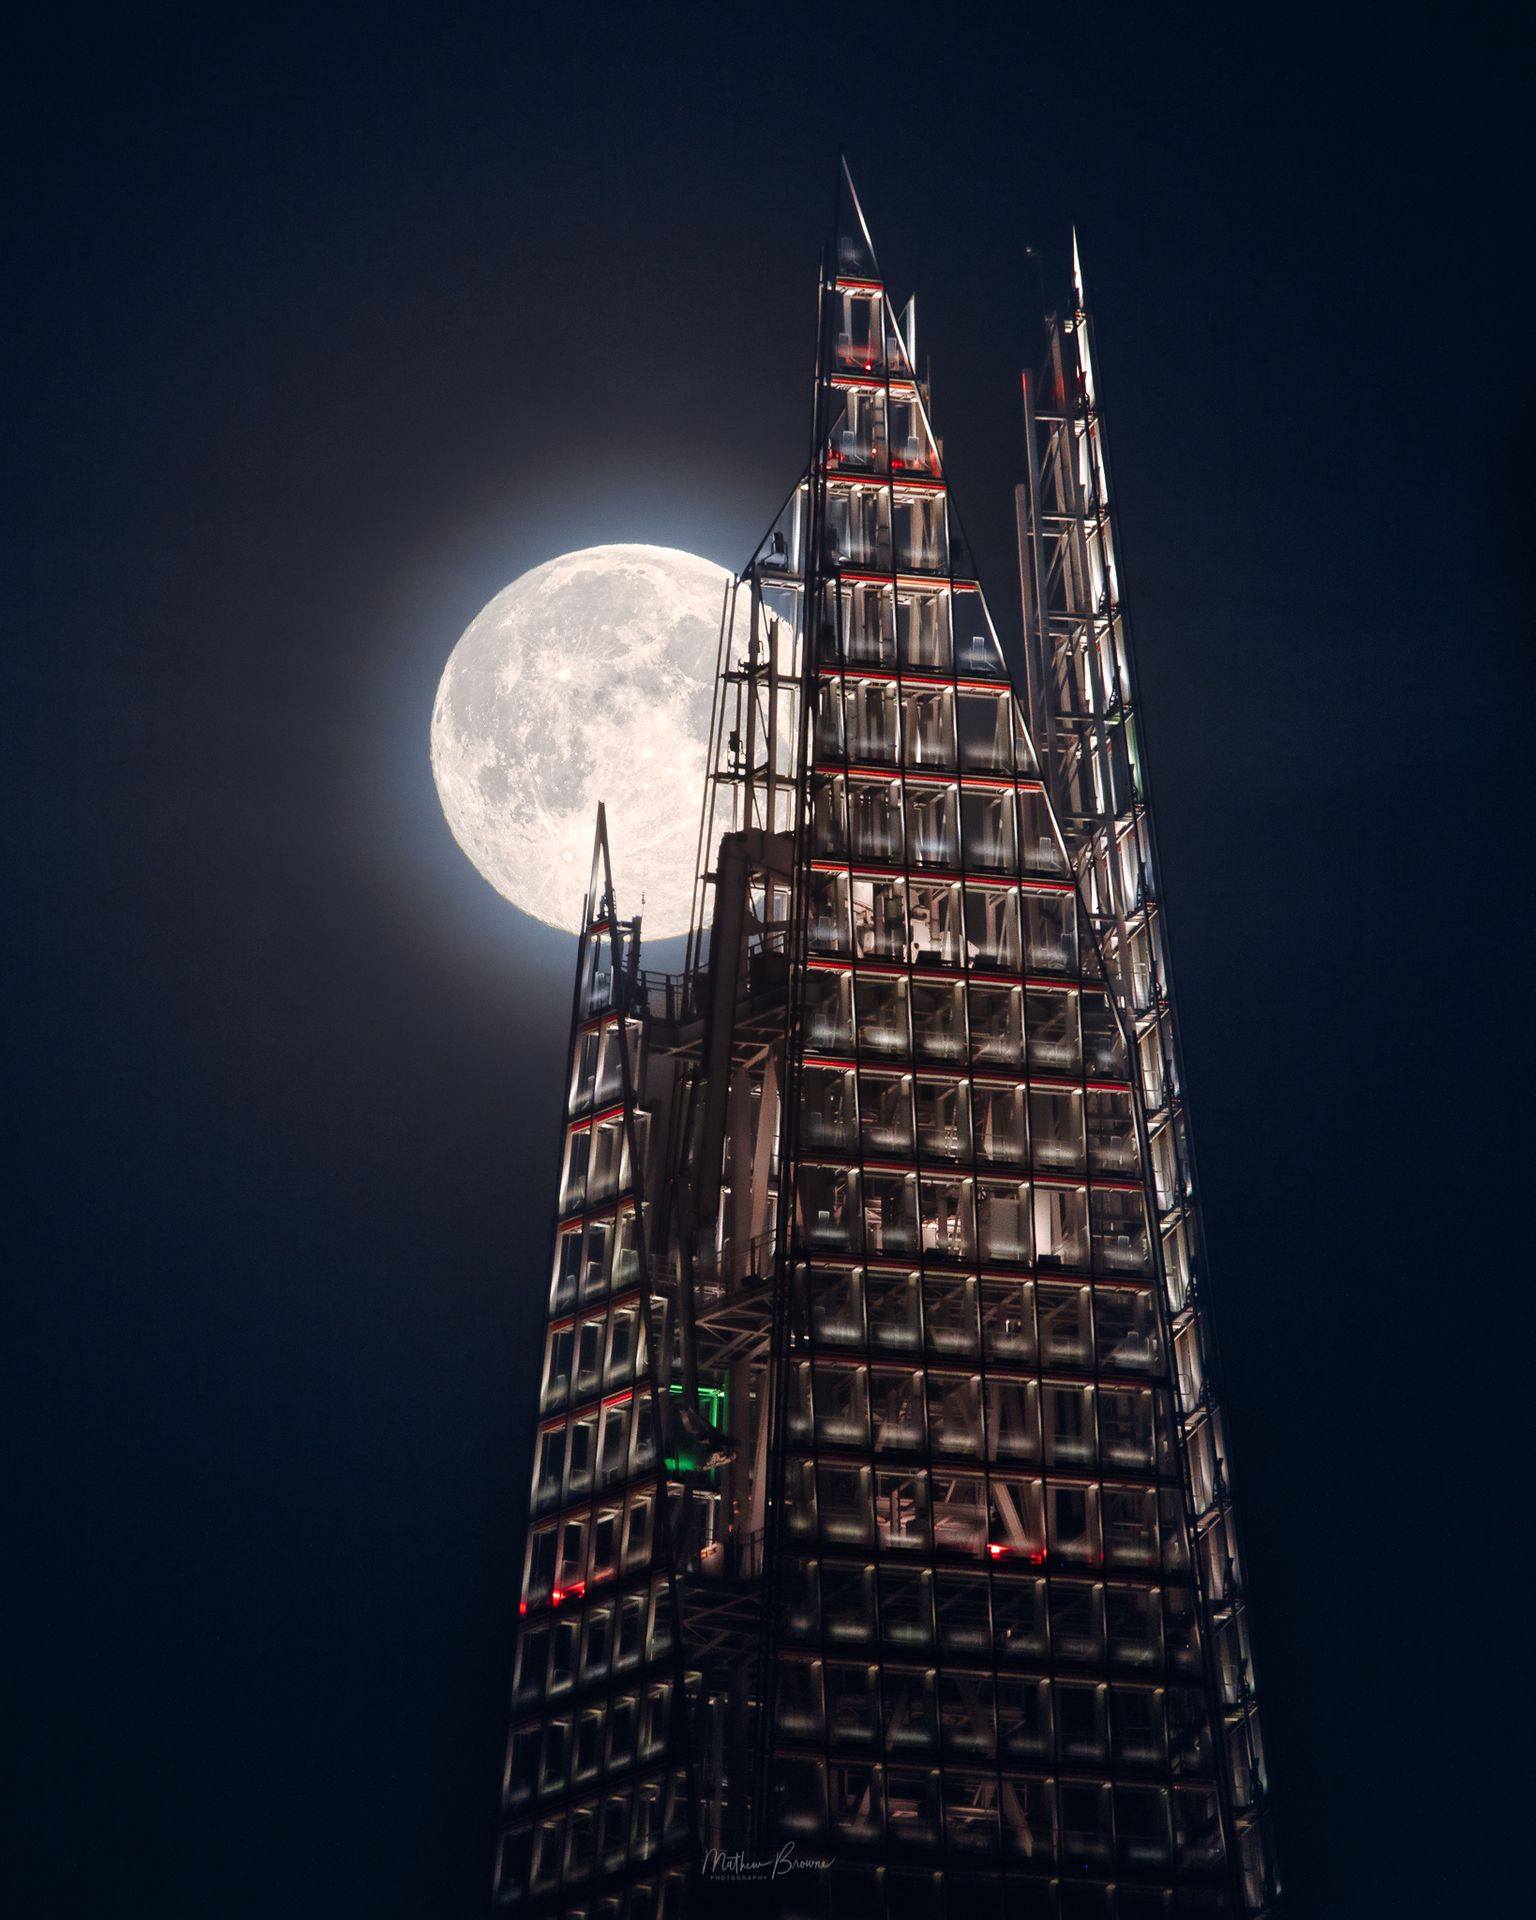
The Shard, London
Mathew Browne
Nikon D850 / Sigma 150.0-600.0 mm f/5.0-6.3
Settings: 3 x bracketed exposures @ 550mm / F10 / ISO 320, aperture priority mode
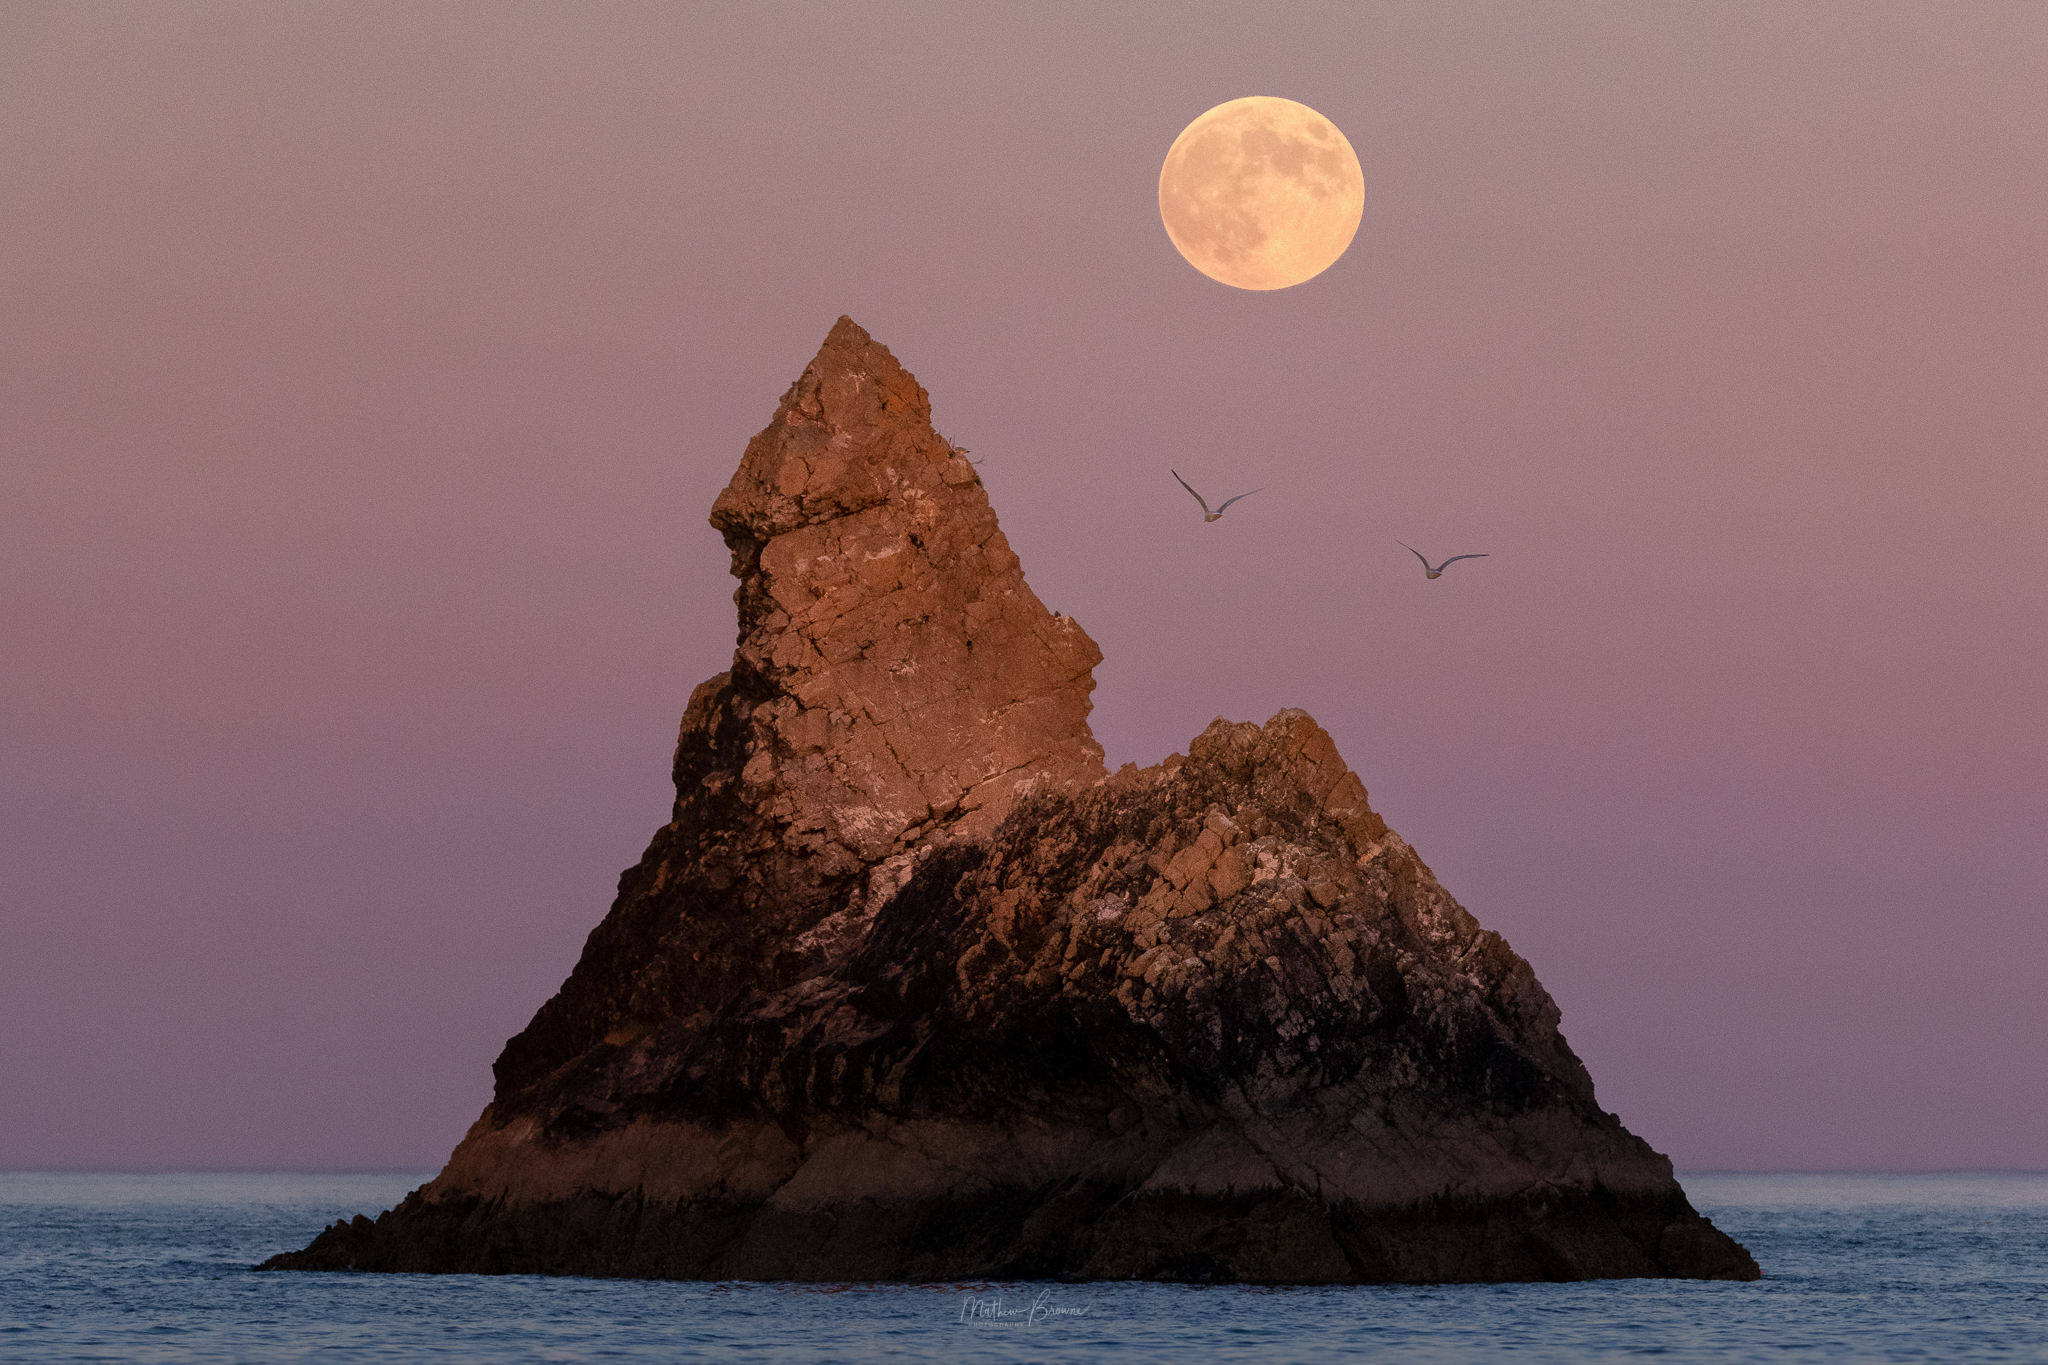
Church Rock, Wales
Mathew Browne
Nikon D850 / Sigma 150.0-600.0 mm f/5.0-6.3
Settings: 3 x bracketed exposures @ 420mm / F6.3 / ISO 1600, aperture priority mode
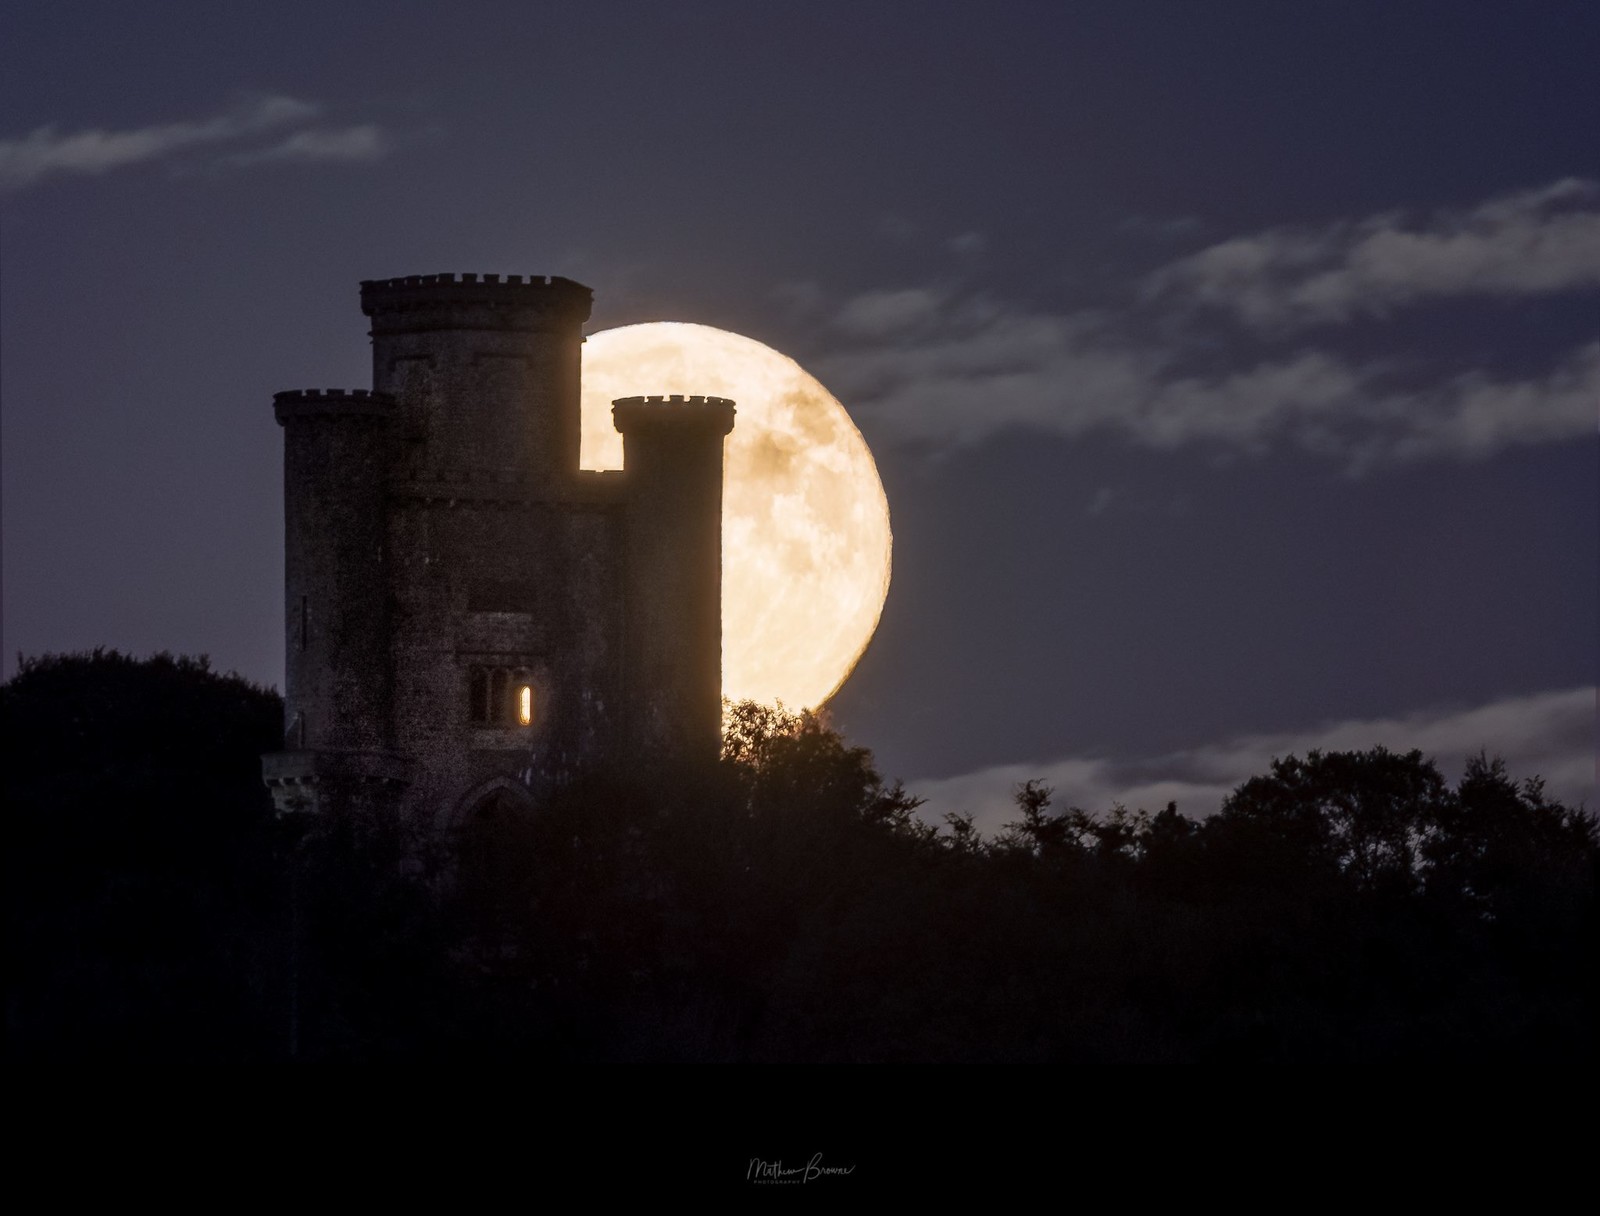
Paxton’s Tower, Wales
Mathew Browne
Nikon D850 / Sigma 150.0-600.0 mm f/5.0-6.3
Settings: 3 x bracketed exposures @ 600mm / F6.3 / ISO 1600, aperture priority mode
Good luck and clear skies!
Remember to tag us on social media with the hashtag #photohound – we love to see your images.